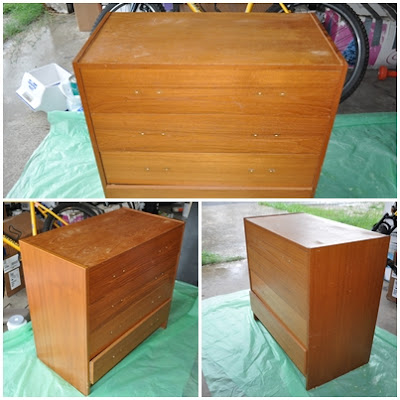
It is about time we started working on Adeline's nursery! Robby had gotten this desk for free in college, and I thought it would be perfect to turn it into a changing table for the nursery. However, it needed some love- hence where the DIY project began....
 | |
| Desk Before |
First, I primed the desk to give it a starter coat. Then, I matched a green color that goes with the fabric in the room and went to town painting.
After I got finished painting- I decided it was too "clean" looking. I am trying to go for a rustic but chic vibe in the room. So- I roughed it up by sanding the edges and then brushed/wiped stain on to the painted desk. Robby and I had many learning curves with our first DIY project together. I wanted to add shelves to the desk to give extra storage for diapers, etc, so we went to Lowe's to buy our supplies. We bought a big piece of plywood and got the helpful guy at Lowe's to cut it for us. Unfortunately, we were 1/8" off on our measurement. Have no fear- we bought Robby a saw for his birthday, SO this was the perfect time to whip it out and correct our first mistake. We spend 2 1/2 hours trying to figure out how to work that stupid saw- no success. We then called our new contractor friend who happens to build things for a living- hence he knows what he is doing. However, he could not figure it out either- which made us actually feel better about ourselves! haha He still came to the rescue by allowing us to use his table saw. (We ended up returning that piece of a junk saw). Next, we realized the hard way that we purchased too big of screws to drill into the board (we may have split the board a hair). It all adds to the "rustic" charm though! haha |
| Finally finished! |
So here is a picture of it in the room. The nursery is not finished yet, but I wanted to give you an idea of what it will possibly look like. I want to put Adeline's changing pad on top and decorative touches, etc
My next DIY project was beautifying this old dresser I got for free from my mom. Yay for free things!
I primed and then painted the dresser and drawers. The pink also matches the bedding in the nursery.
I gave it the same "aging" treatment like the desk.
I think it turned out pretty cute and will be great to organize all of her tiny clothes!
Pregnancy Update: My food of choice has been pretzels and peanut butter. Addy has been moving around like crazy- you can even see her move my whole belly sometimes (which is kind of weird, but awesome at the same time) 81 days to go!


everything looks so SO great!!! Can't wait to meet sweet miss adeline! :)
ReplyDeleteThese pieces are charming! I have a dressing table pad. Do you need one? If so, what size do you need? I could mail it to you. These colors are similar to my 14 year-old's room. The pieces should transition with Ade as she grows.
ReplyDelete